Enable the Wifi Attendance in the Outlet
Wifi attendance lets the employees check in or check out based on the accessibility of the Outlets. However, when you enable the wifi attendance, you have to configure the computer operating system based on Windows or Macintosh.
Kindly take note of the steps:
- Setup Wifi Attendance For Outlet Using the Mac OS machine
- Setup Wifi Attendance For Outlet Using the Windows machine
To enable this feature, an outlet must be created. Refer to the guide below for your perusal.
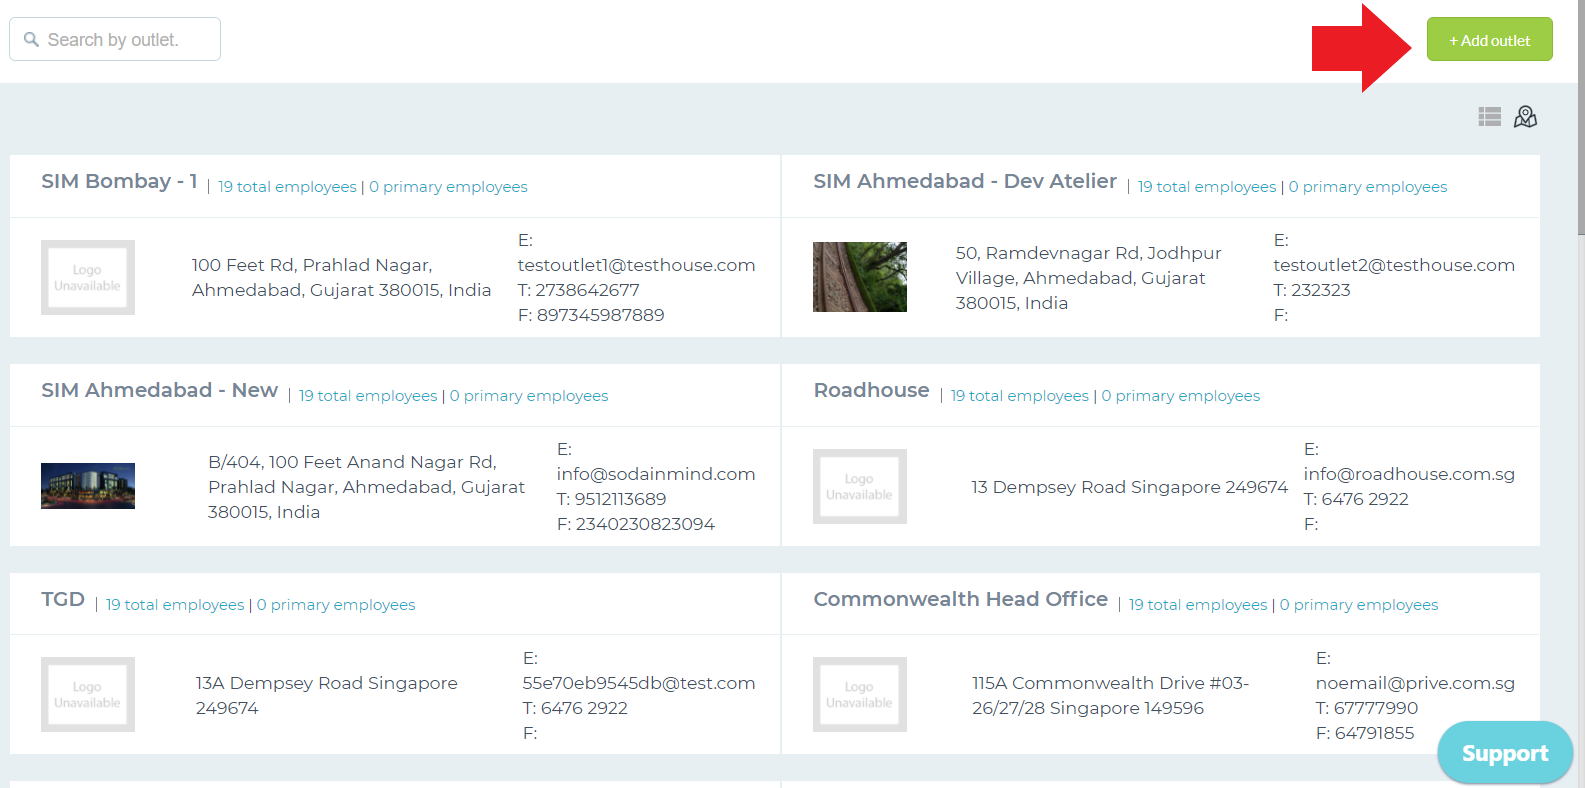
On the dashboard, go to the Outlet section.

Click +Add outlet at the right corner.
If there is an existing outlet, you may select the Outlet by clicking on its profile.
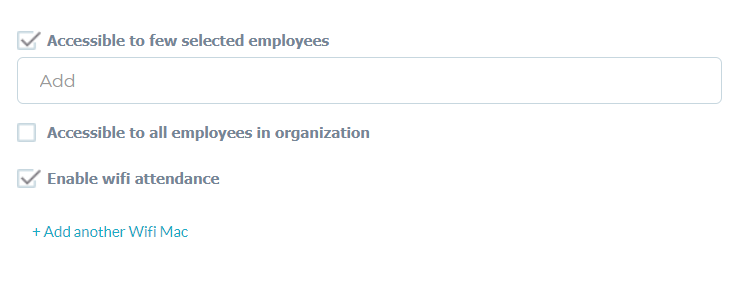
In Edit outlet or Create outlet page, scroll down until you come across with Enable Wifi Attendance.
Check the box.
The +Add another Wifi Mac will appear. Click here and input the code on the field box based on the computer operating system to be used.
Click Save.