Sync the Excel Macro with Rostering Schedule
In rostering, the work schedule of employees must be well maintained and updated. In Carbonate HR, we have featured an Excel Macro integration for a more efficient way of preparing the roster schedule. It will be synced with the Rostering module so that the team members will be able to view their updated schedules.
In essence, the synchronization feature allows the Manager or the Admin to prepare the schedule in a spreadsheet. Then, in a single click, the schedule will appear in the rostering.
Before doing so, the excel macro integration must be enabled from the Company Settings. Below is the user guide for your reference:
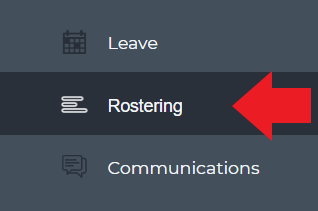
On the dashboard, go to the Rostering section.
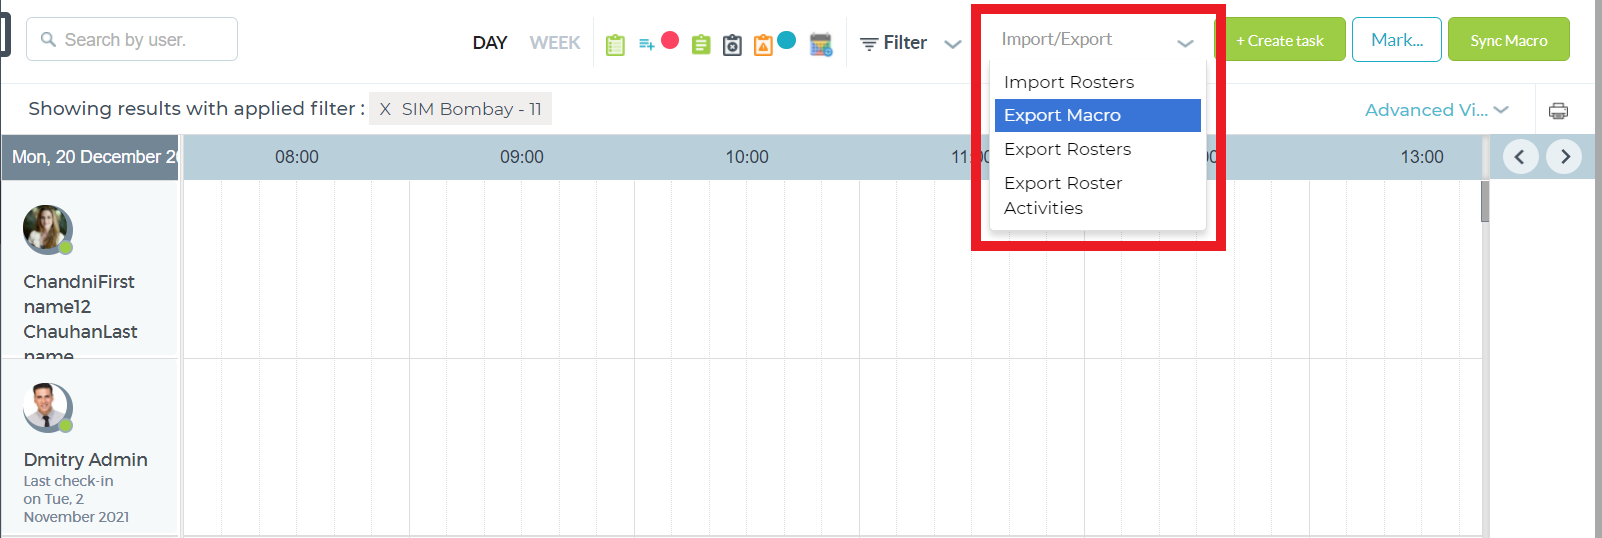
At the top right corner of the page, go to the Import/Export and select the Export macro from the dropdown list.
On the Export data page, click the Download file.
Take note of the Secret key and copy it. You will need this on step 12.

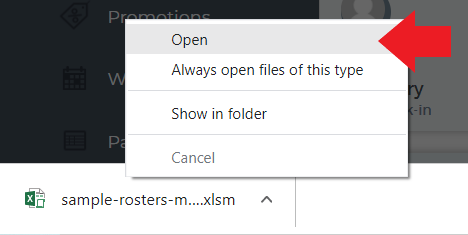
Open the downloaded file.
The default set-up is generally the downloaded data that appears at the bottom part of the window. Then, you may just right-click it and select Open to automatically open the Excel file.
On the Excel file, click Enable Editing if the sheet is in protected view.
When a security warning appears, click the Enable content.
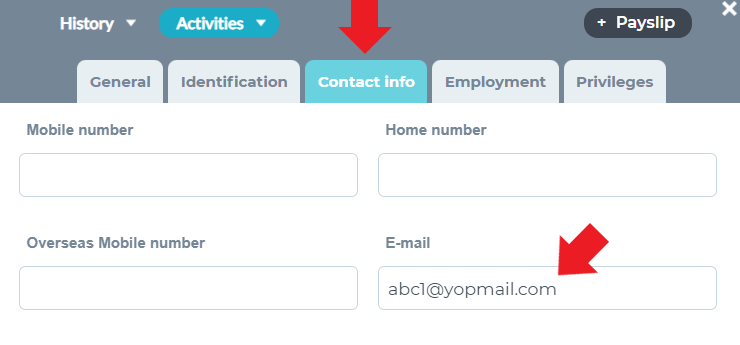
Go back to the Carbonate HR and go to the profile.

Click the Contact info tab. Go to the Email section and copy the email address.
To copy the email address, follow this shortcut method:
- Put the cursor on the email field box.
- Press CTRL + A (keyboard)
- Press CTRL + C
Click the X to close.
Note: The email may also be copied from the General tab.
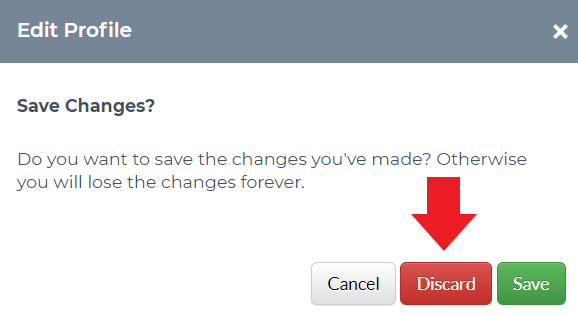
On the Edit profile, click Discard.
But, if there is a change in the email address, click Save.
Go to the Excel Macro, and paste the email address.
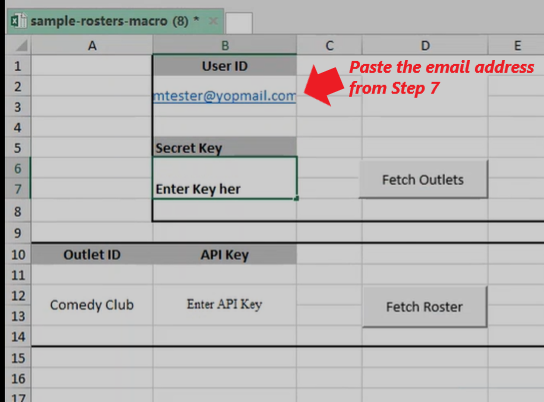
Copy the secret key from the Company Settings and paste it on the Excel Macro.
The secret key can only be accessed by an Admin account holder and/or a Manager with Settings privileges.

On the Excel Macro, paste the secret key as shown in the image below.
Click the Fetch Outlet button.

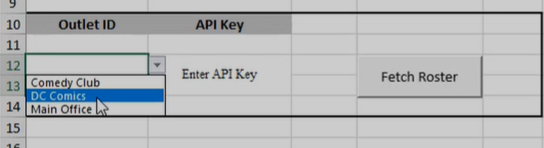
On the outlet ID, click on the cell and select the outlet from the dropdown list.
To get the API key, refer to Step 3. Paste it on the cell containing ” Ener API key”.
Click Fetch Roster.
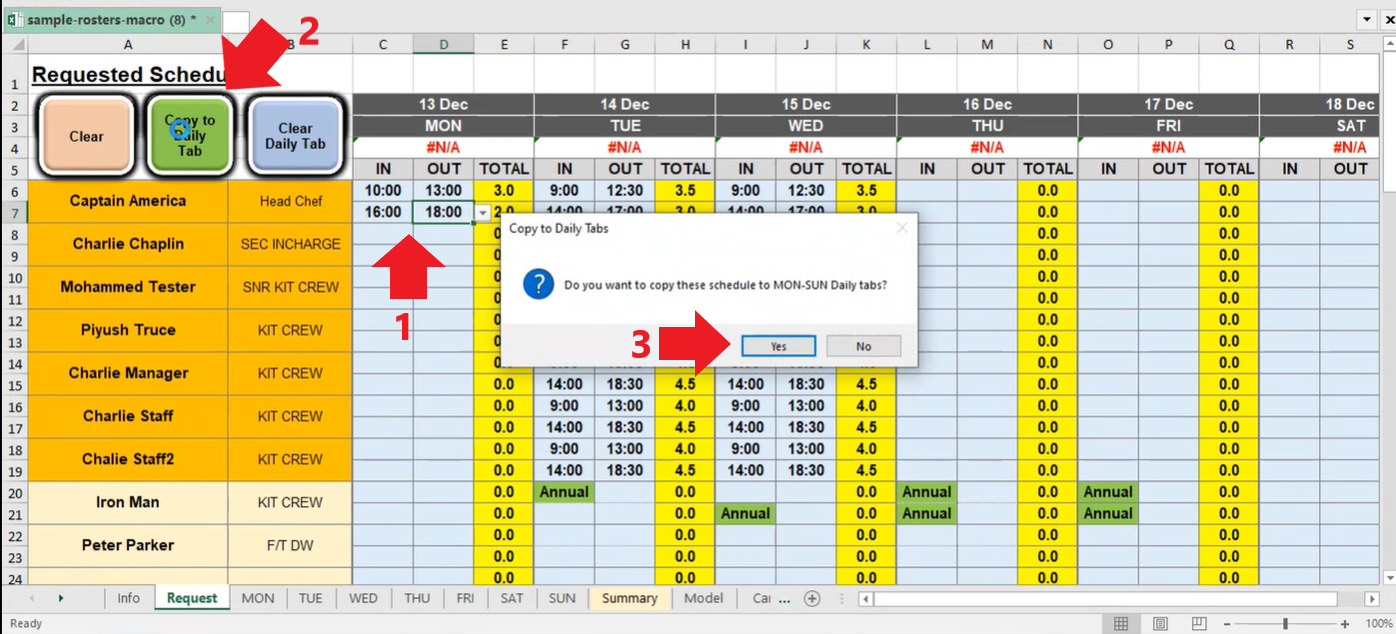
Make the necessary revision on the scheduled time as shown in arrow #1.
Once done, click the Copy to Daily tab as shown on arrow #2. Select the Yes button on the prompt as shown on arrow #3.
On the Days tab (MON to SUN), you can make the necessary revision and update the date on cell A1.
Click OK on the prompt page.
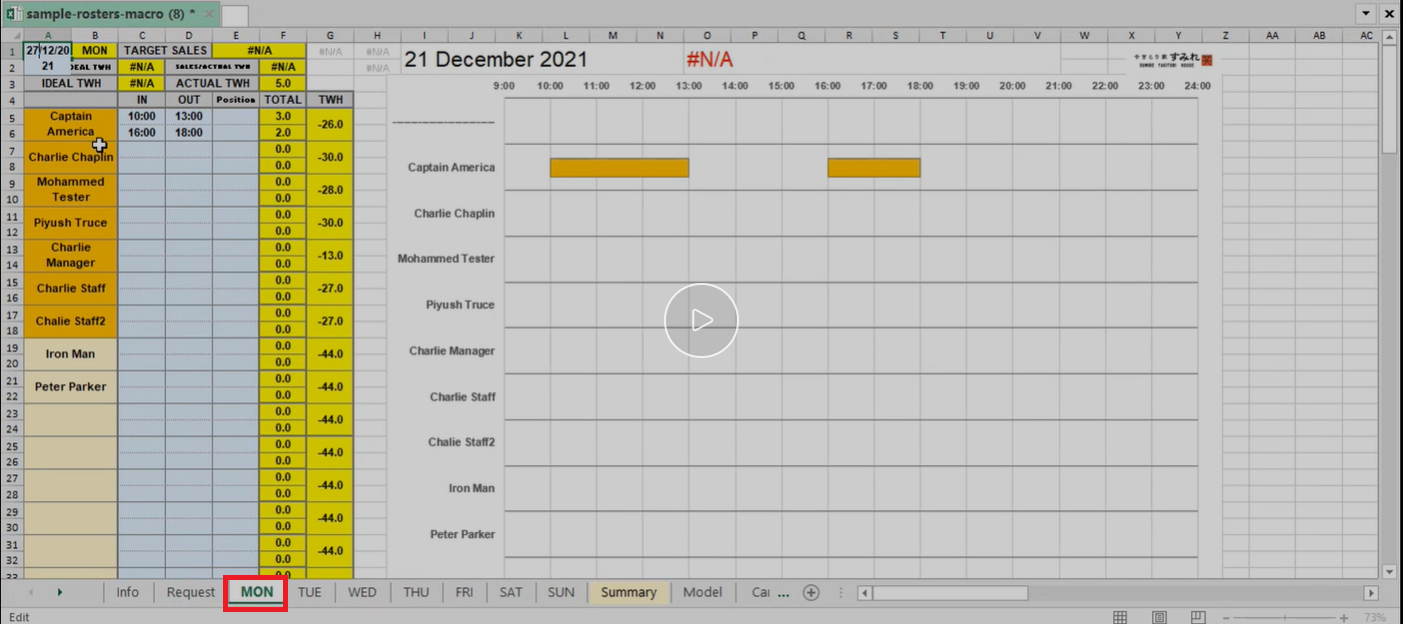
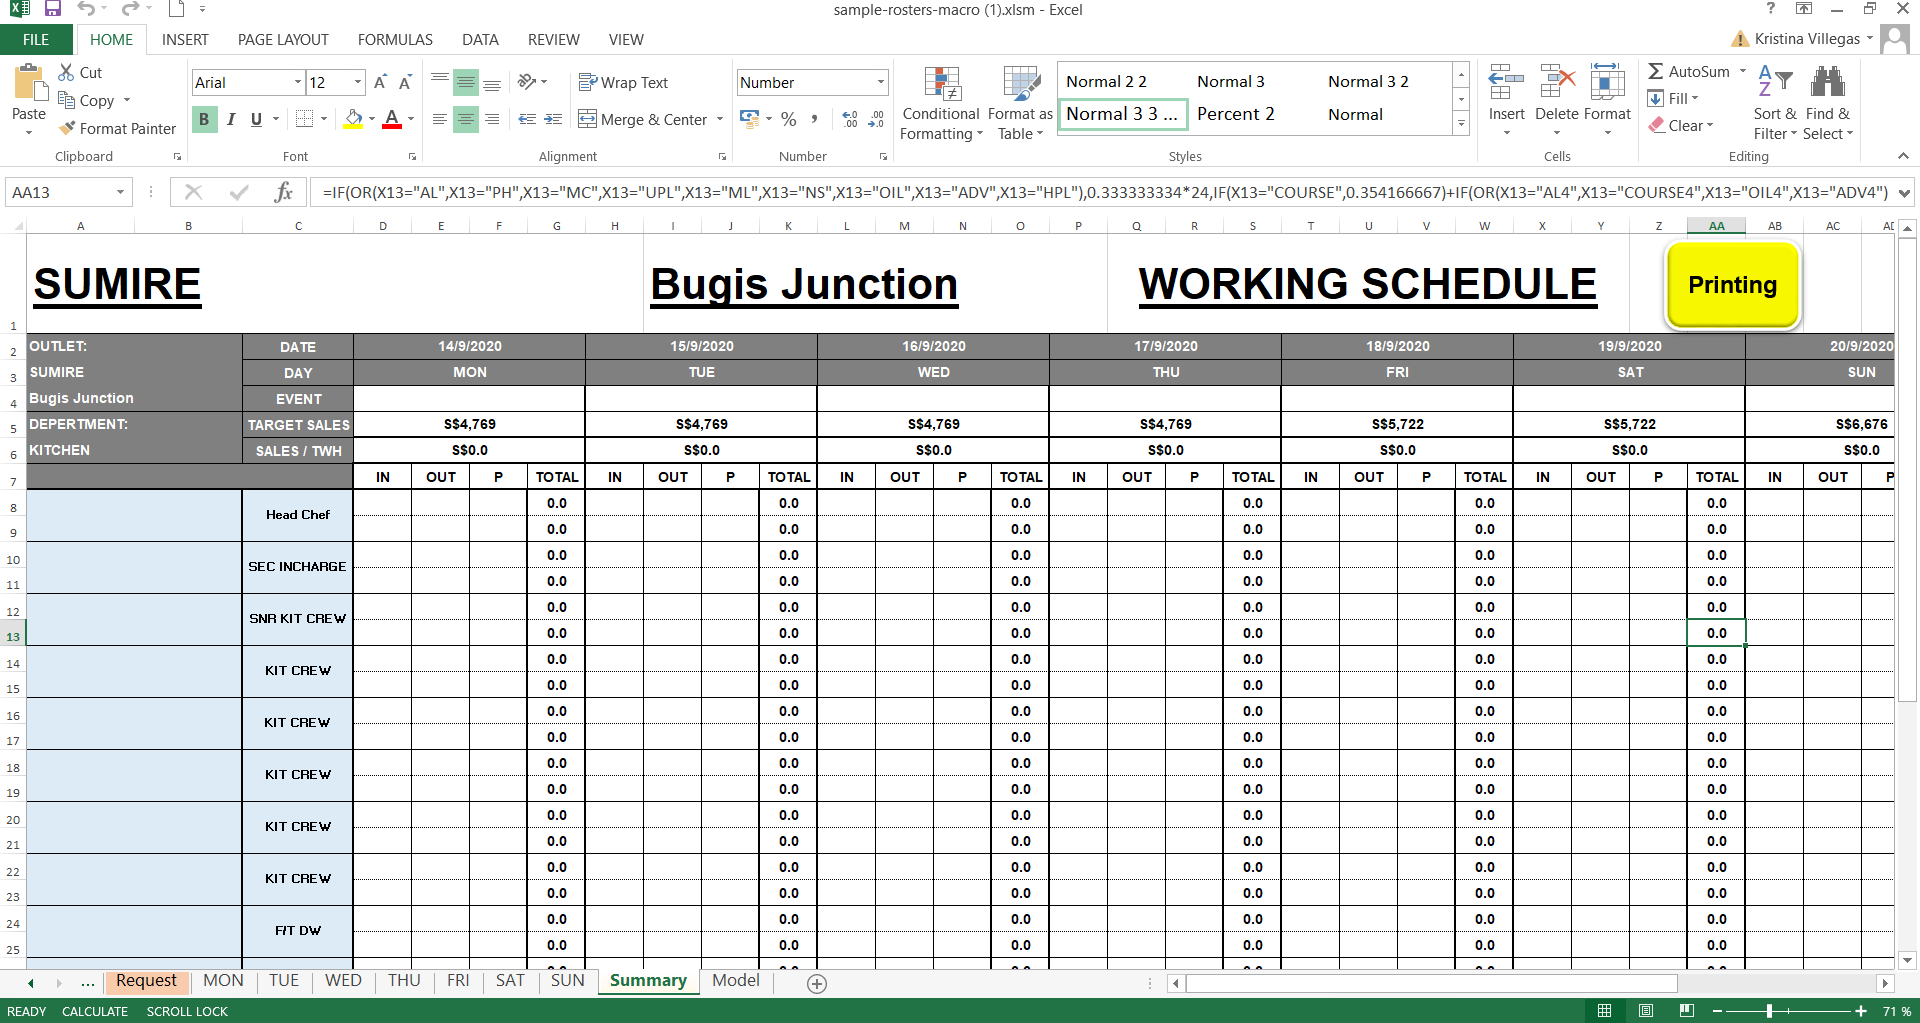
Go to the Summary tab. Review the roster schedule of the staff.
Once all are good, then you may click the Sync button.

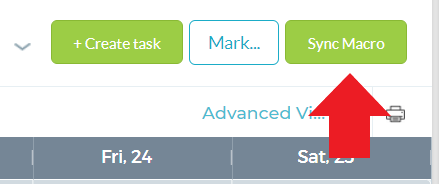
Go back to Rostering section. At the top right corner of the page, click Sync Macro.
Now, you can view the updated roster.
Related User Guides