How to sync Carbonate payslips to Metro?
To log into the carbonate system, follow these steps:
Access the URL https://carbonateapp.com/
Open a web browser and enter the URL where your instance is hosted. This URL is usually provided by your organization or the administrator of the system.
Reach the login page.
Once you enter the URL, you should be directed to the login page. This is where you will enter your credentials to access the system.
Enter your credential
On the login page, you will typically find two fields:
● Username or Email: Enter the username or email address associated with your account.
● Password: Enter the password associated with your account.
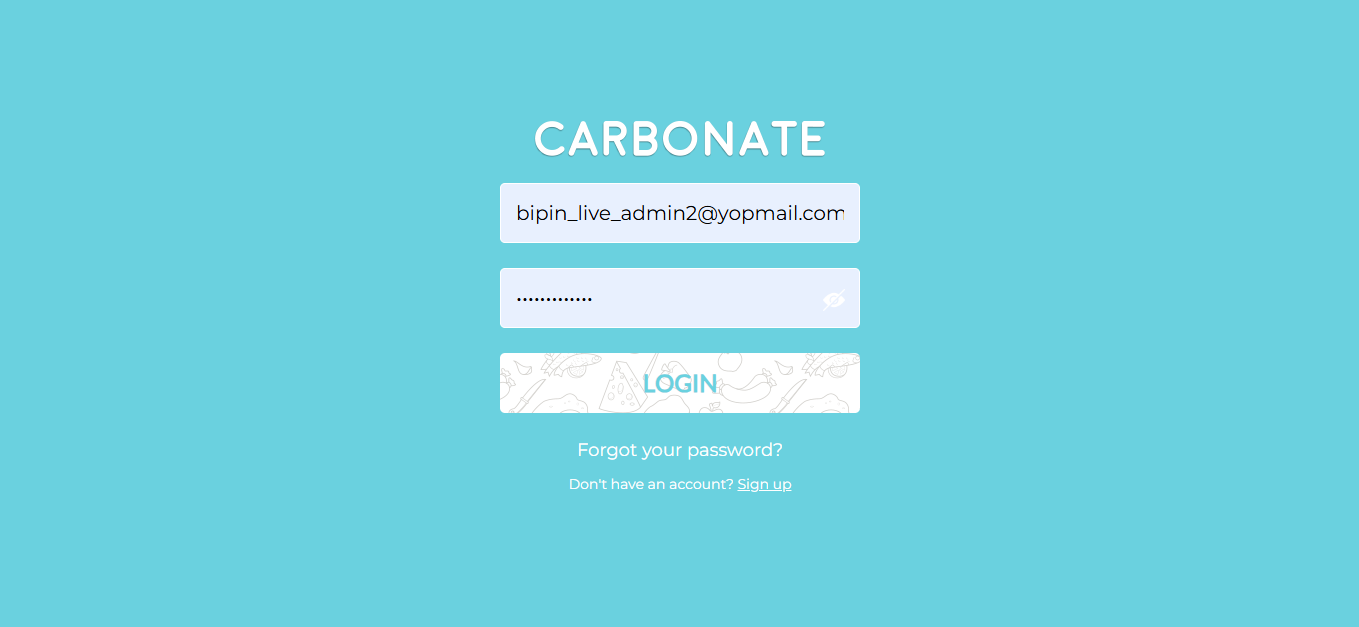
Click the Login Button
After entering your credentials, click “Login” or “Sign In” button. This will initiate the login process.
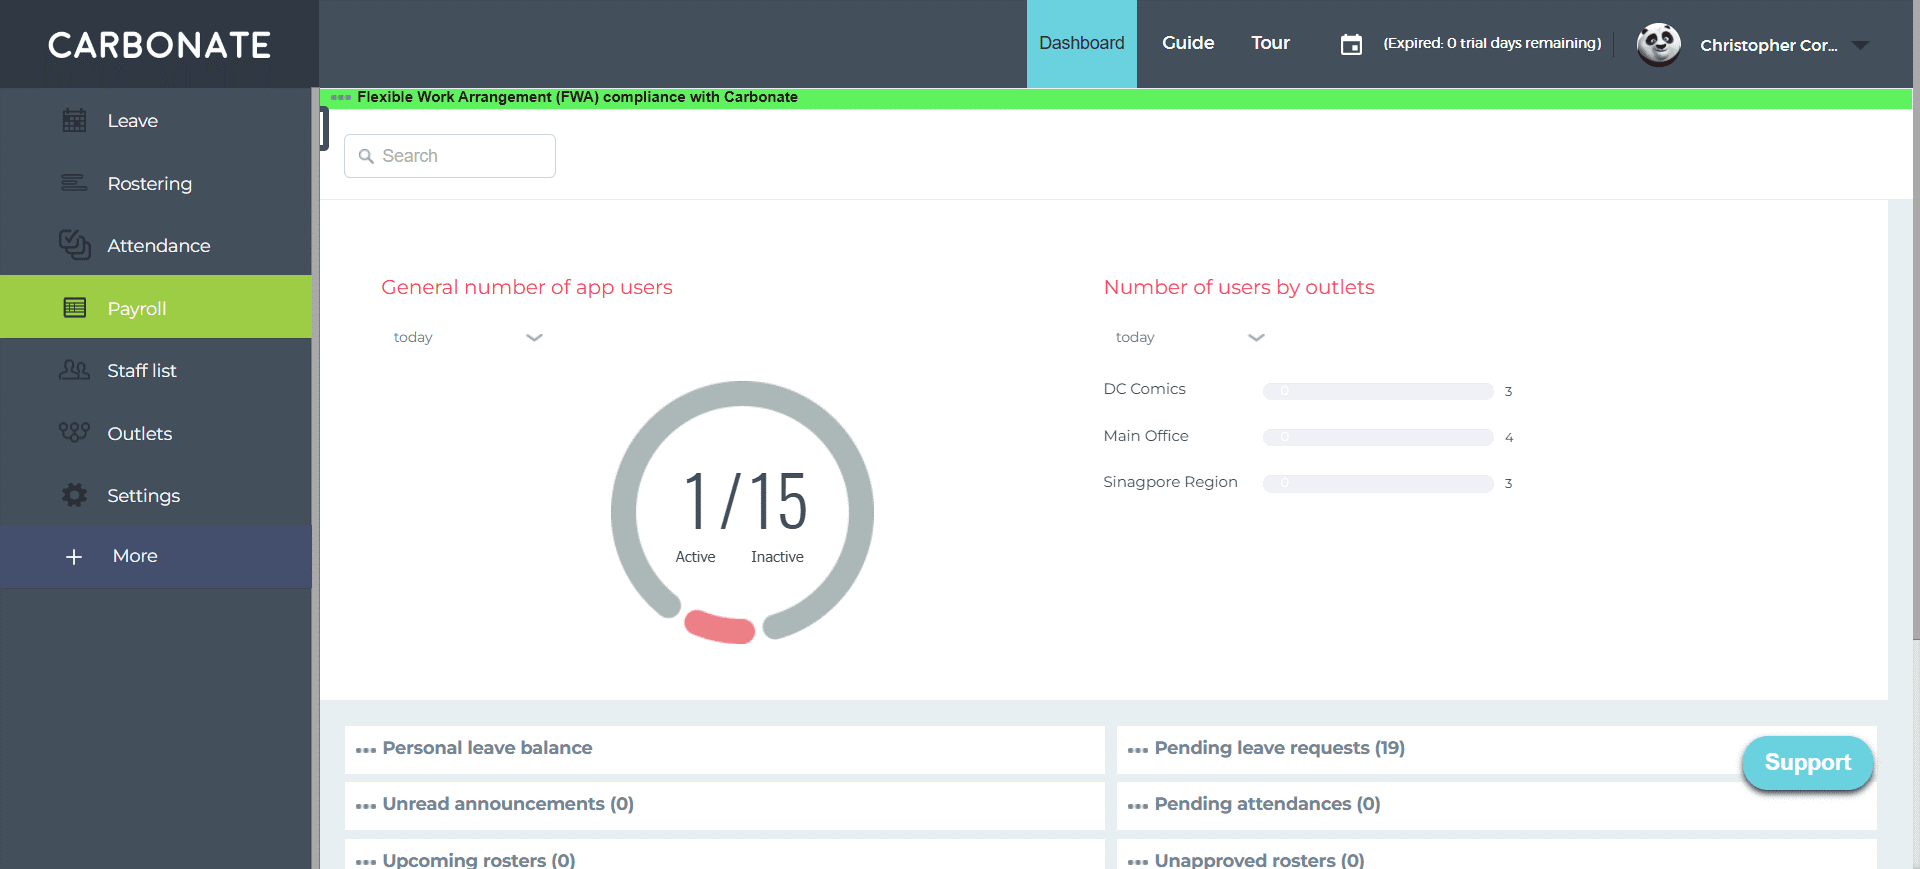
You will be directed to the default dashboard or the module you have permission to access.
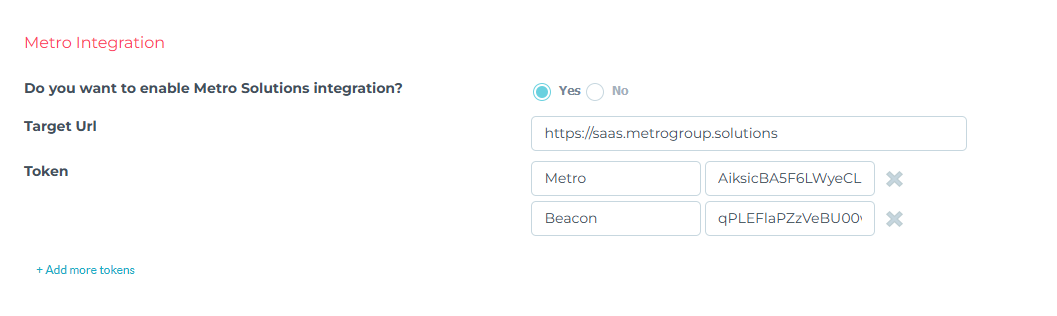
Go to settings > Company > Metro Integration
Enable the setting.
Target url: Enter url https://saas.metrogroup.solutions
Token: Enter token by generating it from Metro.
How to configure carbonate key and token from metroerp system – Click Here
Click on “Save” button from bottom of the page.
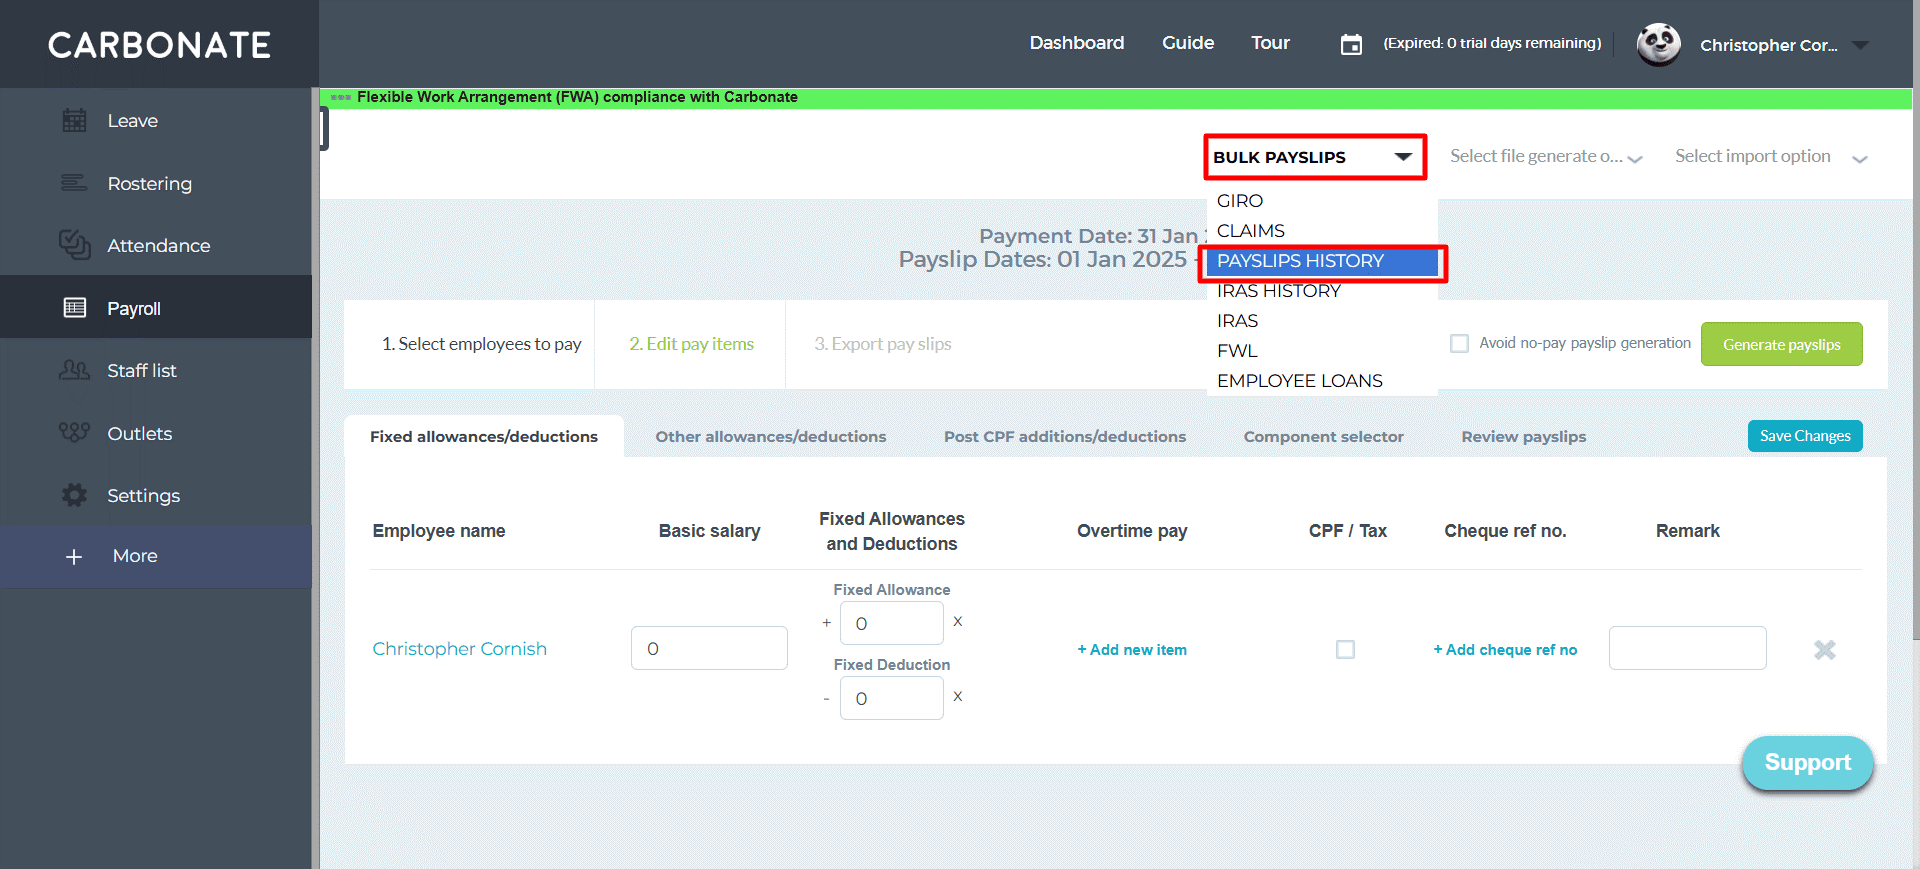
Click on the menu item of Payroll at the left side to be redirected to the main Payroll page.
Page Elements
BULK PAYSLIPS : This is for generating multiple payslips at once.
Select Pay Period : This section allows you to specify the pay period for which the payslips are being generated. You can select the month, year, and payment date.
+ Add all” and “- Remove all : These buttons allow you to quickly select or deselect all employees”
.
Employee List : This shows a list of employees, with their names, departments, and potentially other information. You can select or deselect individual employees by clicking on them.

Select employees to pay : This is the current active step. It involves selecting the employees for whom payslips need to be generated.
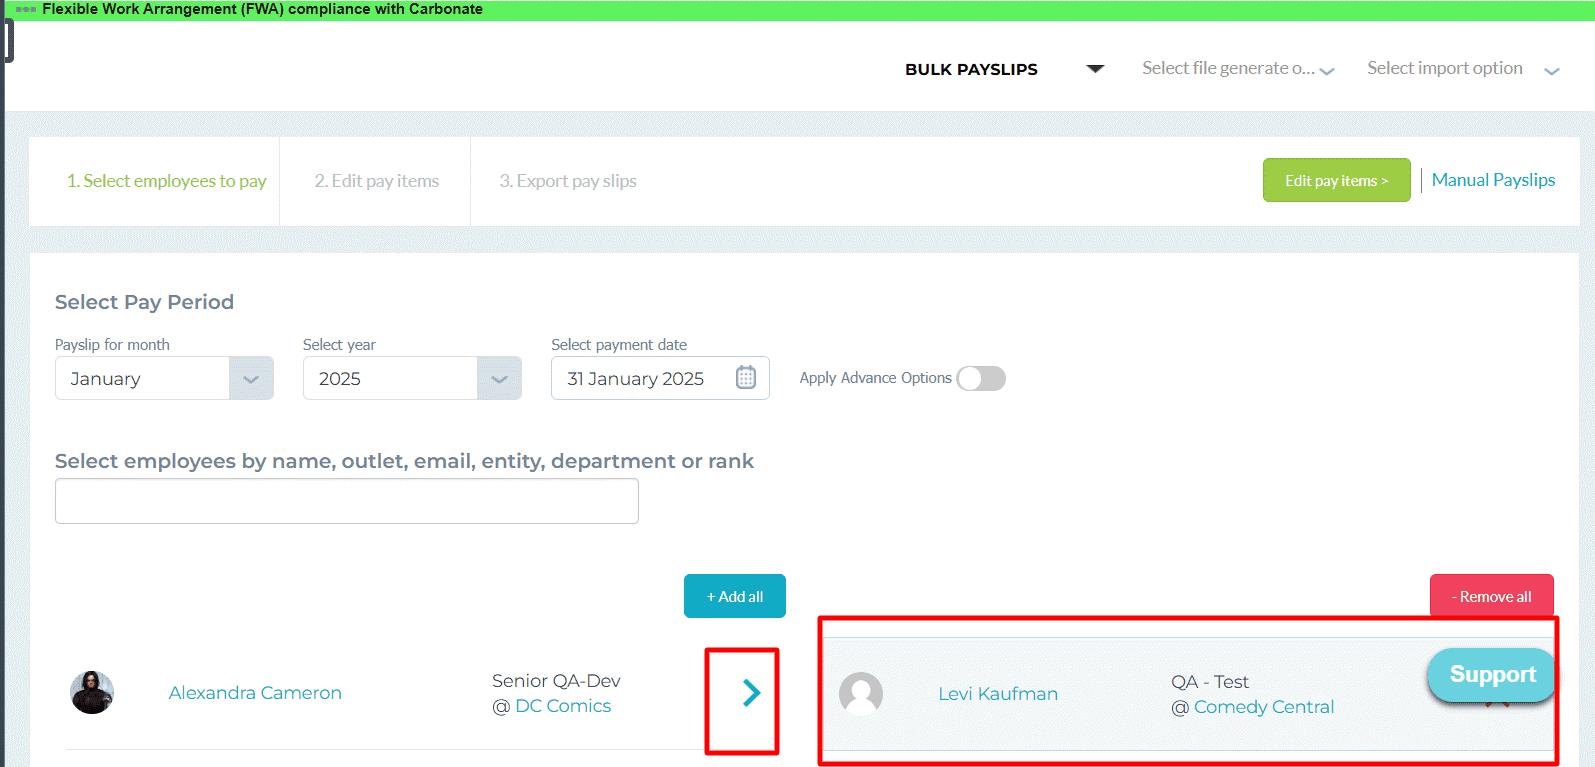
Edit pay items and Manual Payslips :
These are links to access related features. “Edit pay items” takes you to the step mentioned earlier, while “Manual Payslips” is for generating individual payslips manually.
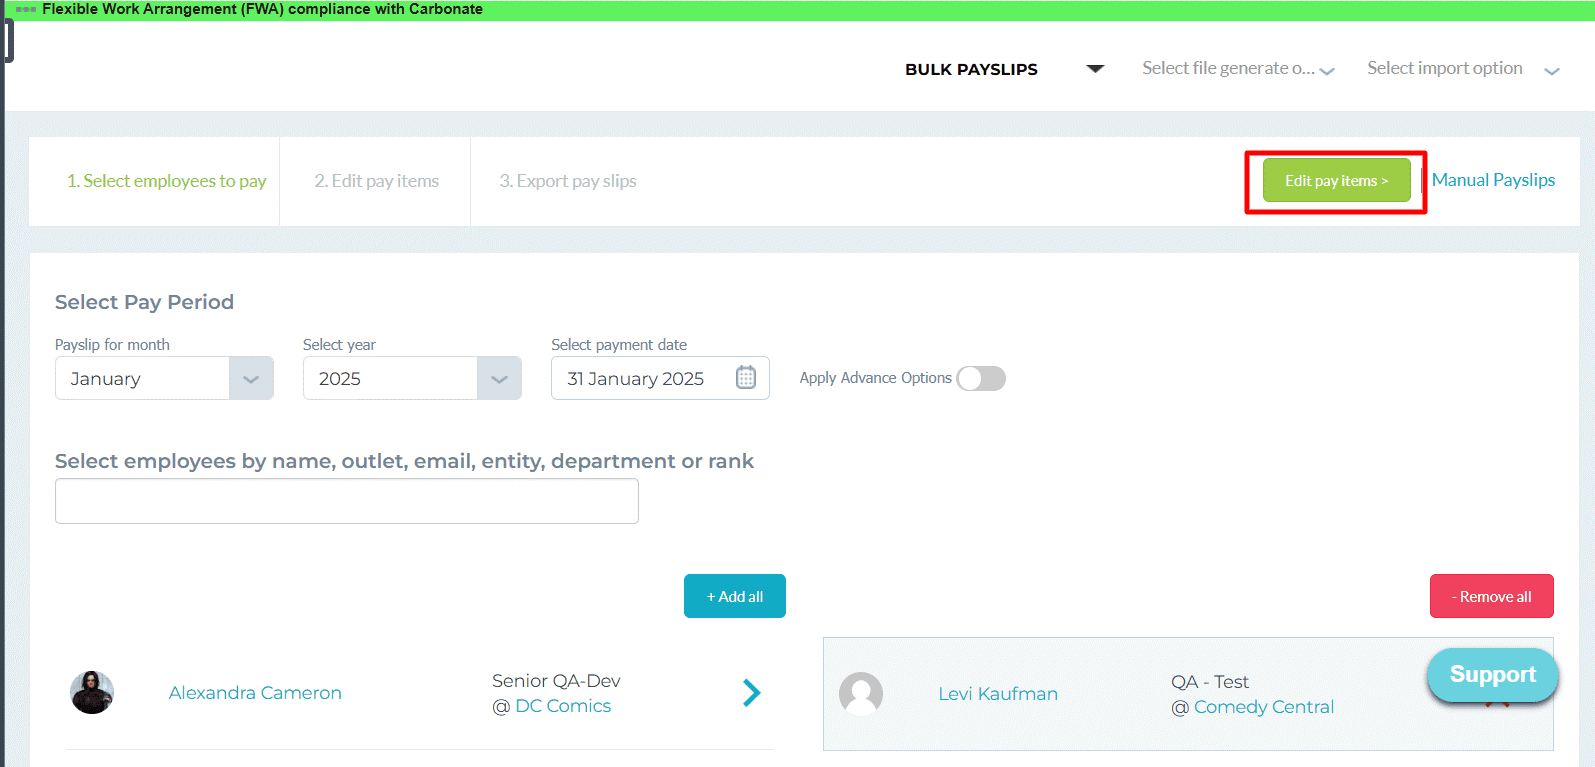
Edit pay items :
This refers to the next step where you can review and modify the pay items included in the payslips, such as base salary, bonuses, deductions, etc.
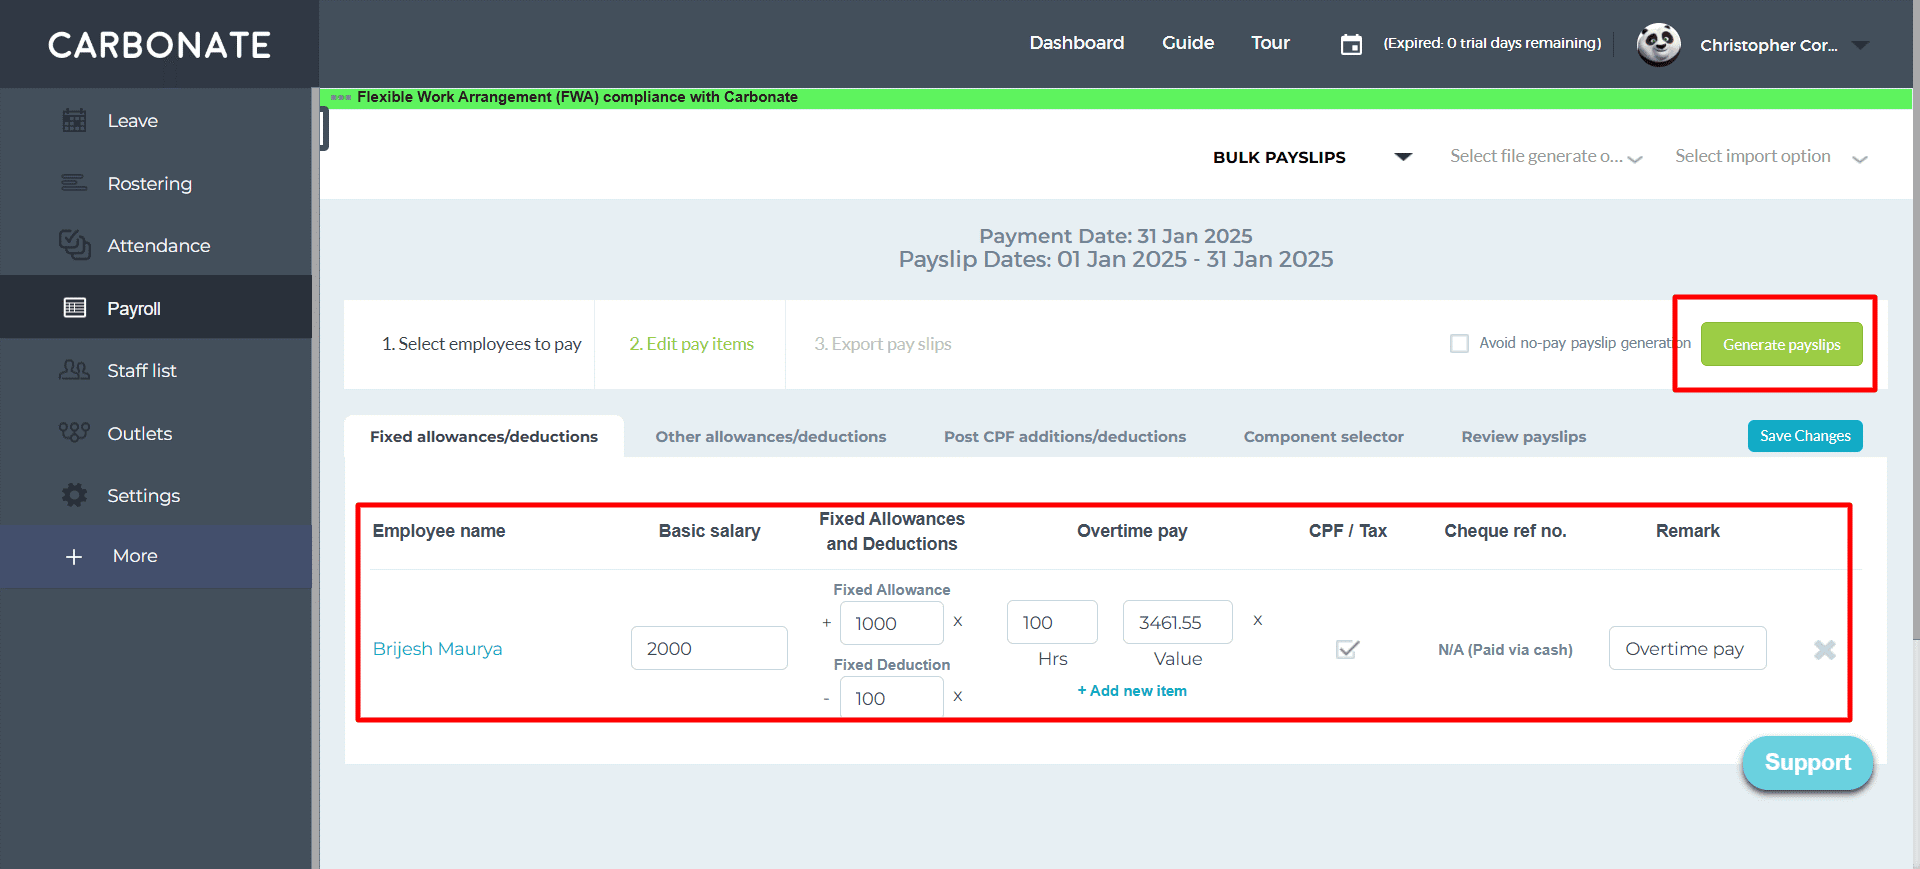
Payslip Generation Buttons:
“Generate payslips”: This is the primary button to initiate the payslip generation process.
Avoid entry screen”: This allows users to skip a certain step or screen during the payslip generation process.
“Save Changes”: Use this button to save any modifications you make to the employee data or payslip settings.
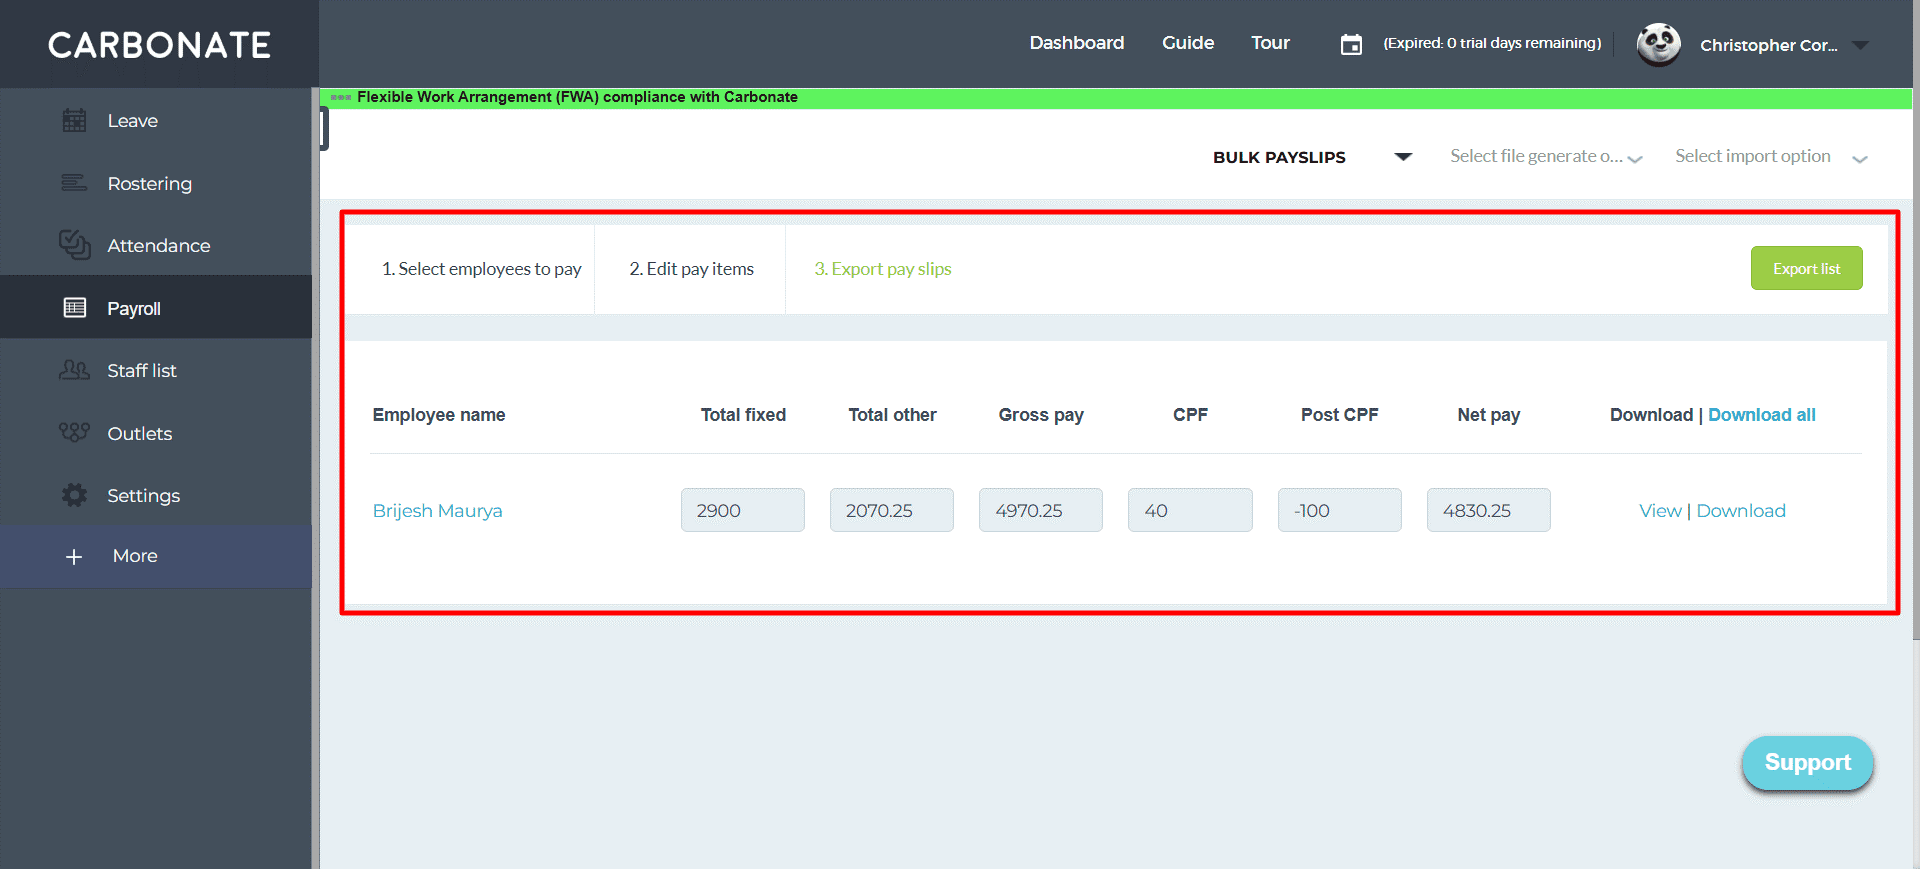
It is generated successfully.
Now, Click on the Bulk Payslips Dropdwon Menu and select the option Payslips History.
View the Payslips History dashboard.
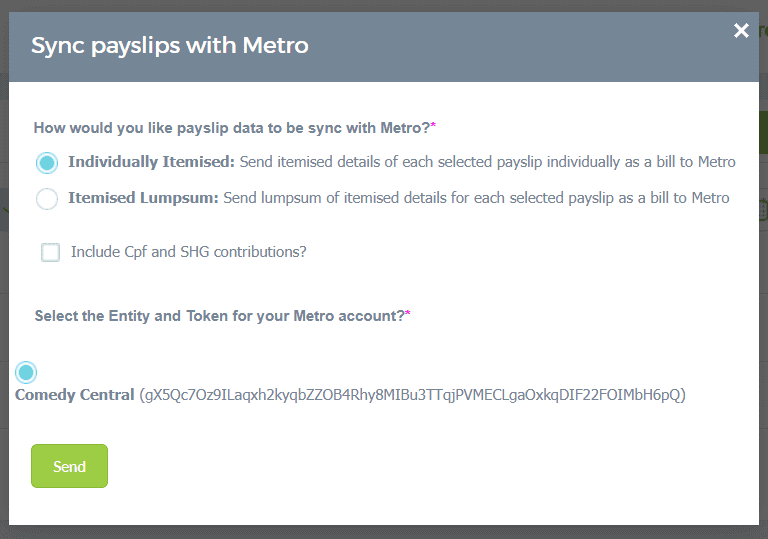
To sync multiple payslips to Metro, check the boxes next to each entry.
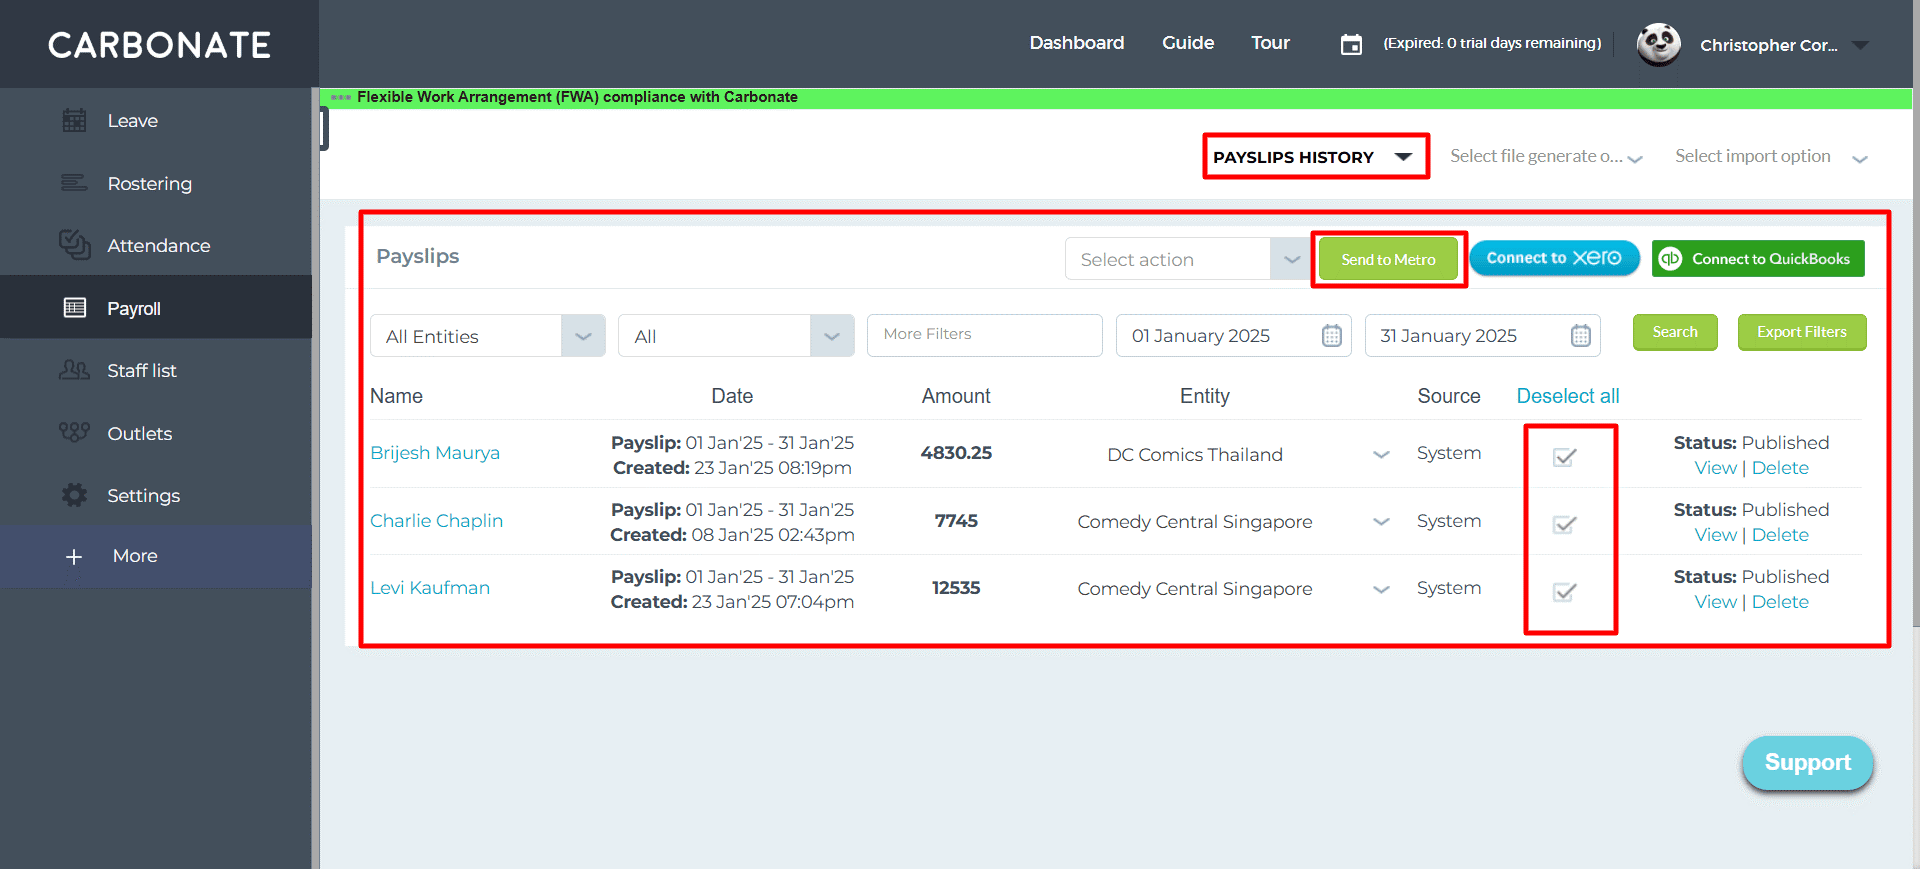
“Now, Clicks on the “Send to Metro” Button” should be “click”
Open and view the Sync payslips with Metro in page.
When the user clicks on the “Send Button”, the payslips are successfully synced to Metro.
How to view sync payslips in Carbonate Metro ERP? – Click Here