Connect the Payslip History to XERO or QuickBooks
Carbonate HR is integrated into some accounting software like Xero and Quickbooks. Both Xero and QuickBooks are cloud-based accounting software platforms for small- and medium-sized businesses, and both can process business payments, manage and pay bills, and payroll functions. With these integrations, Carbonate gives you a cost-effective and quick way to ensure your accounting tasks are being done correctly in an accurate and time-saving way.
When connecting to XERO or QuickBooks, the following are the requisites.
- You must have a XERO or QuickBooks account. If none yet, kindly create your account in Quickbooks.
- The company must be set up in XERO or Quickbooks.
- Payslip must be generated, and this is because what we are processing in the XERO or QuickBooks is the payslip history. Below is the user guide for your reference.
- Generate Individual Payslip
- You may now connect to XERO or Quickbooks when these three (3) pre-requisites are done.
In this guide, we use the Quickbooks software. However, you may also refer here if you are using the XERO.
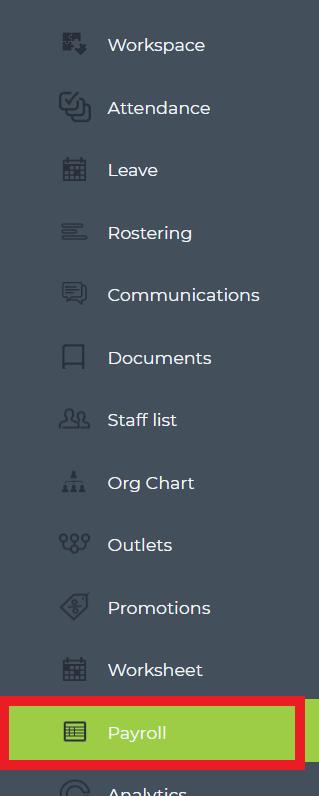
On the dashboard, go to the Payroll section.
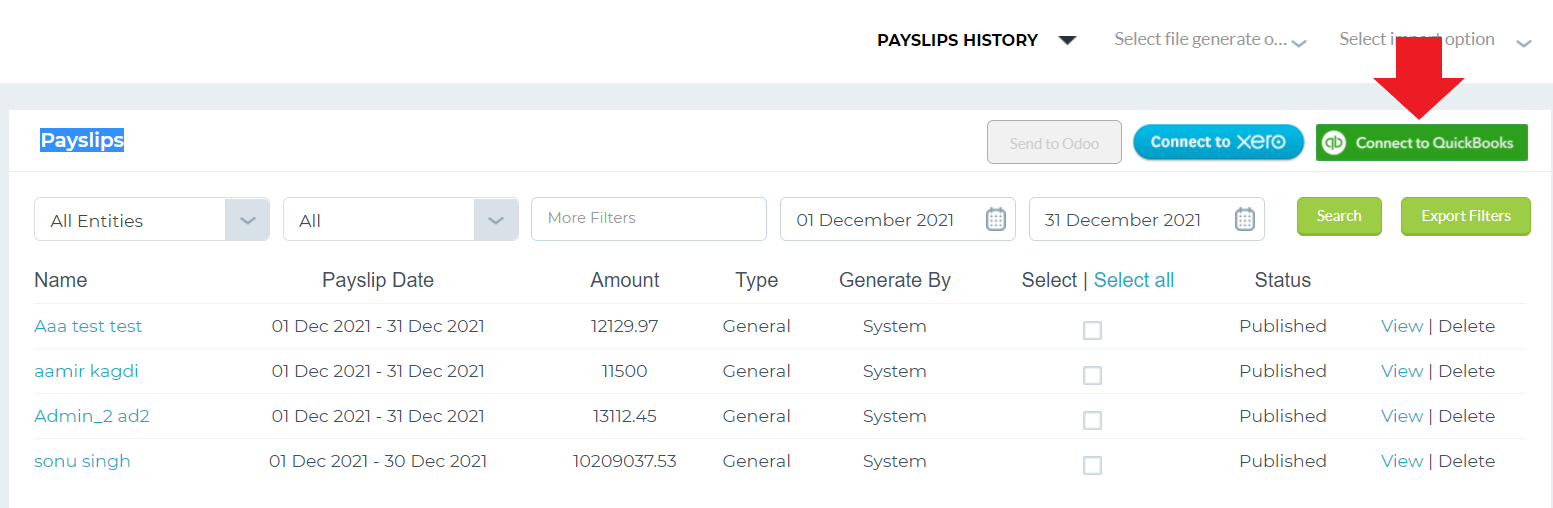
On the top portion of the page, go to the Bulk Payslip. Click the Payslip history from the drop-down menu.

On the Payslip page, all the payslips generated will show up.
Click the Connect to Quickbooks.
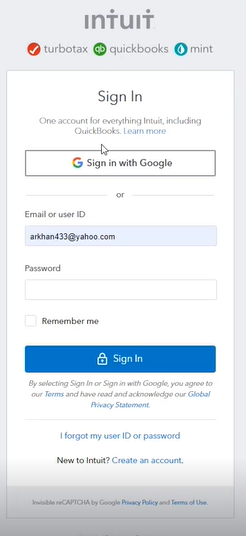
Login to the Intuit Accounts – Sign in page.
If there is difficulty logging in, kindly check your username and password. If the issue still persists, contact the Quickbooks team for assistance.
When your company is not yet entered in the Quickbooks, this page will prompt.
Kindly set up your Company in Quickbooks. Enter the company name and follow the prompt.

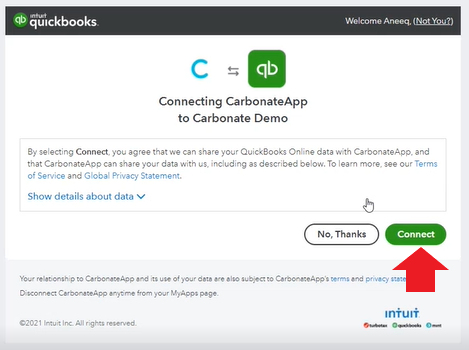
Click the Connect button as shown in the image below.
Then, if connected successfully, a prompt “Connected with Quickbooks Account Successfully” will show up on your Carbonate Page.
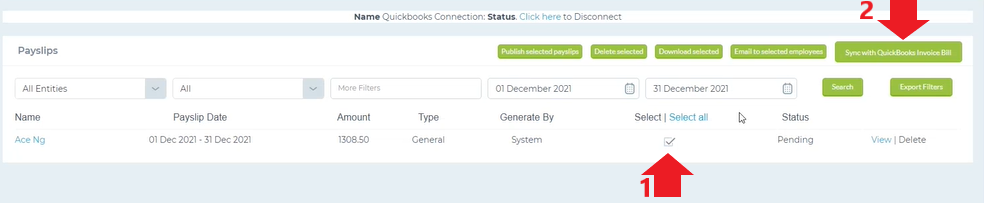
On the payslip page, select the payslip you want to sync with Quickbooks.
Tick the respective box of the specific payslip. To select all payslips, tick the Select all box.
Then, click the Sync with Quickbooks Invoice Bill.
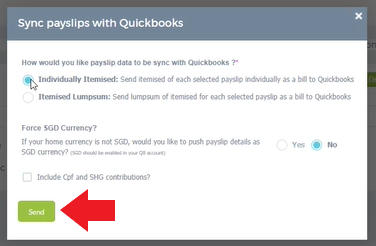
On this page, select the desired option on how you want to sync the payslip with Quickbooks.
A. Individually Itemized. It shows the individual payslip in Quickbooks.
B. Itemized Lumpsum. It shows the total amount of all the synced pay slips in Quickbooks.
Forced SGD Currency. Toggle the Yes button if your home currency is not SGD, but you want to use the SGD currency. If you prefer to use your home currency (e.g. Pesos for the Philippines), you may toggle the NO.
Include CPF and SHG Contribution. If you also prefer to sync the CPF and SHG contribution indicated in the payslip, you may toggle the box.
Once done, click the Send button.
Then, a prompt ” QuickBooks synced successfully” will appear.
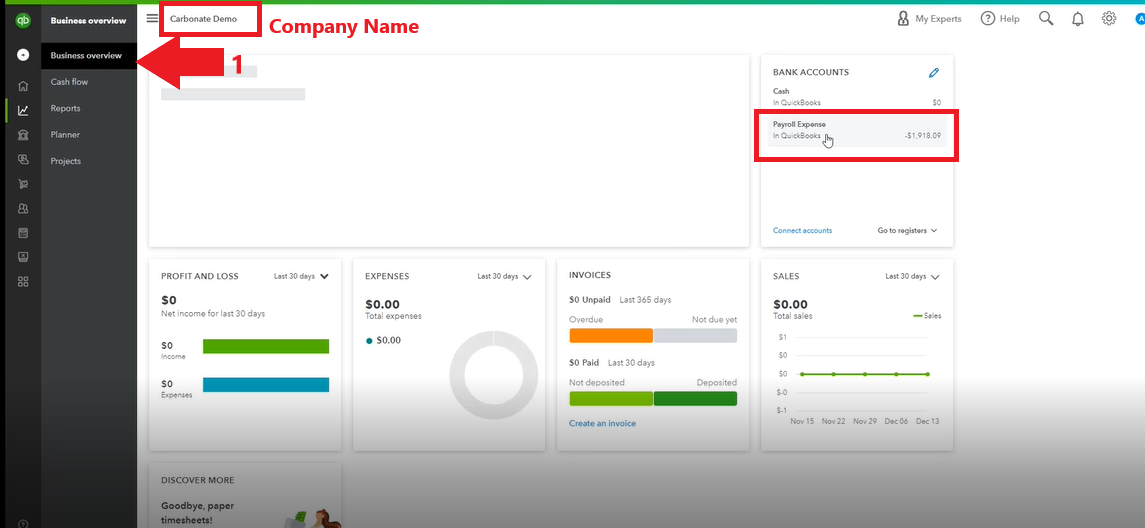
Now, go to the Quickbooks Online site. Open your account by logging in to your credentials and select your respective company.
Go to the business overview to view the Payroll expenses as shown in the image.
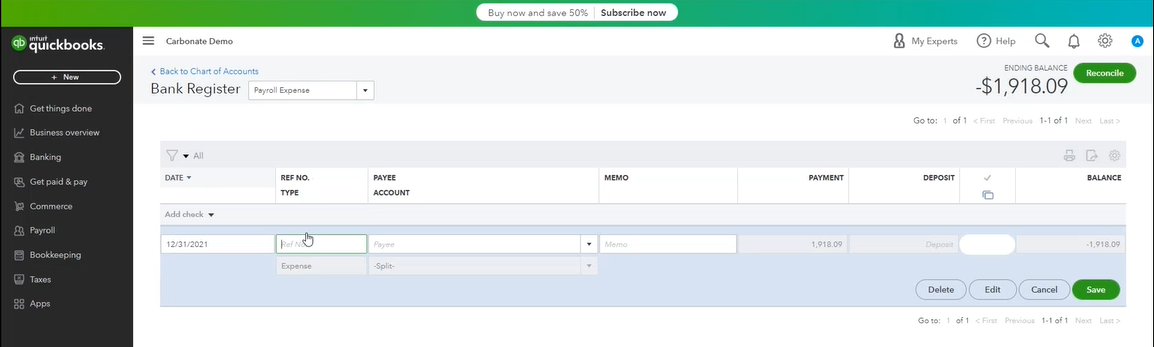
Click the Payroll expense to view the register.
Related User Guides